
How to Clean a Corny Keg Step-By-Step
Keeping your kegs clean and properly sanitizing them prior to filling them is an incredibly important practice for homebrewers. If you purchased a used corny keg, a thorough cleaning before your first use is definitely required. We recommend doing a deep clean on your keg after every 2-3 uses but rinsing well and sanitizing in between each use is an absolute must or you will risk ruining your beer. It is highly recommended that whenever you finish a keg, immediately rinse it well with hot water so that the remaining sugars don’t set, which will make the cleaning and sanitizing process much faster and easier when you’re ready to fill the keg again.
Confused about the types of kegs? Check out our Ultimate Guide to Kegs here to learn about each type of keg!
There are several ways to clean a keg, including commercially-available keg and carboy washers, homemade keg and carboy washers (like ours!), and disassembly.
For the purpose of this article, we’ll focus on how to properly disassemble and clean the components of your corny keg by hand without any special equipment:
Step One: Safely Release the Pressure in the Keg
Whenever you are going to be opening or disassembling a keg, the first, and most important, step is to vent the keg’s pressure. For most ball-lock kegs, there is a ring on the lid that releases the pressure in the keg safely when pulled. Most pin-lock kegs do not have a manual pressure-release. For pin-lock kegs, the pressure must be released from the “OUT” post on the keg. This can be done by carefully pressing in the poppet on the post (some recommend using a screwdriver, while others recommend using something like a chopstick to avoid damaging the poppet). In our opinion, the safest way to purge the pressure from a pin-lock keg is to use an extra unconnected beer line quick disconnect to safely purge the pressure. Note: You can purchase replacement lids for pin-lock kegs that include a manual pressure release valve if you prefer not to worry about other methods of purging.
Step Two: Remove the Lid
Once the pressure in the keg has been released, pull up on the lever attached to the lid. At this point, the lid may release itself from the keg easily, or it may stay stuck. If it doesn’t immediately release, pull the manual pressure release valve again to ensure all of the pressure is released, then gently press down on the lid until it releases from the keg. Make sure that the rubber o-ring is still attached to the lid (they sometimes get stuck under the lip of the keg). Turn the lid 90 degrees toward the shorter end of it to slide it out of the mouth of the keg.
Set the lid and the lid o-ring aside for cleaning.
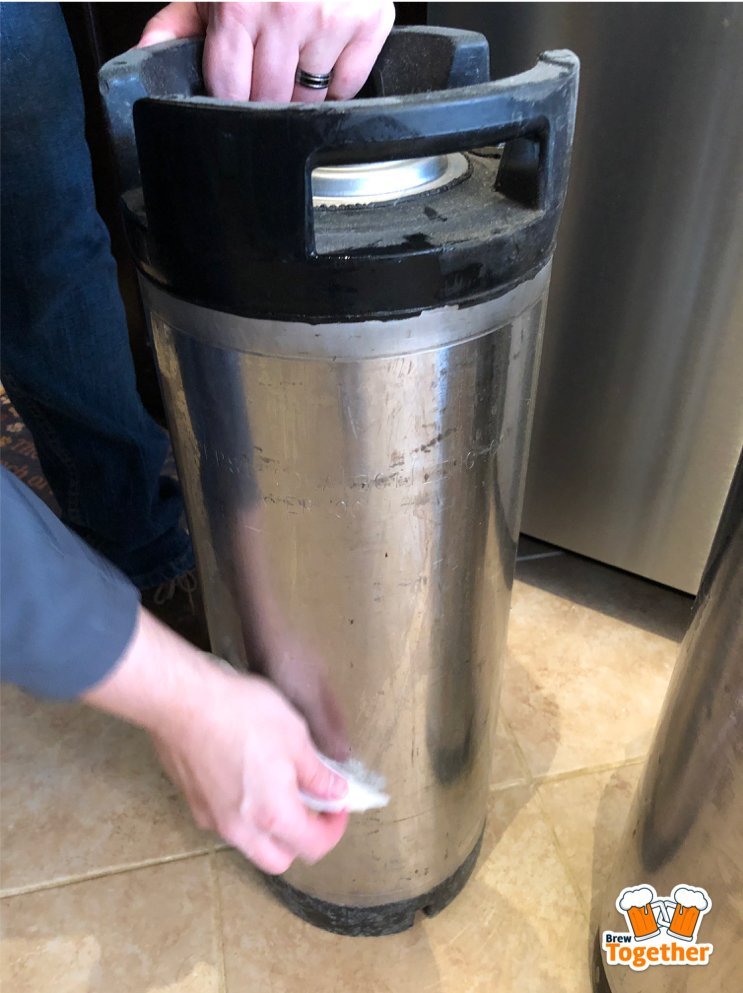
Step Three: Clean the Outside of the Keg
After you have released the pressure and removed the lid, use a wet rag or paper towel to wipe off as much of the dust and grime on the outside of the keg as possible.
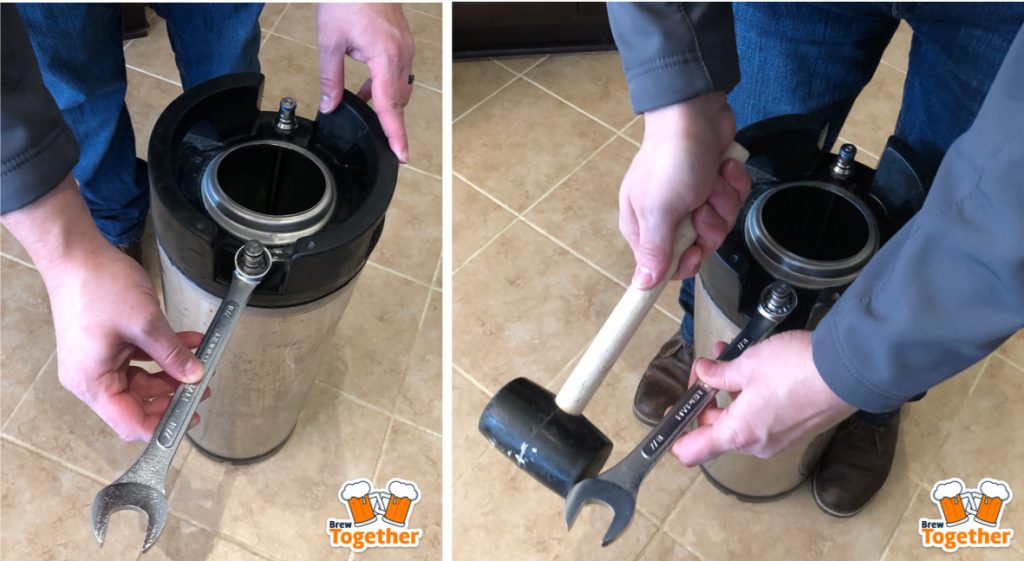
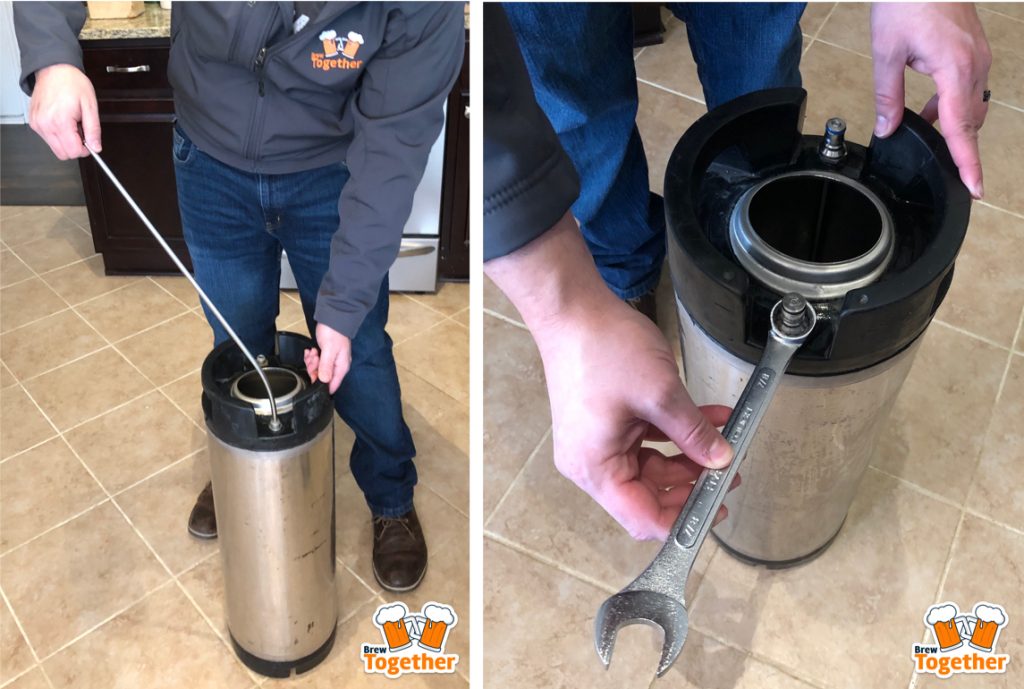
Step Four: Remove the Posts and Dip Tubes
Carefully use a crescent wrench to remove the posts. Generally, ball-lock kegs require a size 7/8 wrench. The posts may be difficult to remove. If you cannot remove them by hand, carefully tap the crescent wrench gently with a rubber mallet until it releases, but be careful not to strip the threads on the posts or the keg. Inspect your posts for damage. They may not seal properly if they are damaged. Posts are inexpensive, and replacing damaged ones can save you a lot of money in lost Co2 or beer.
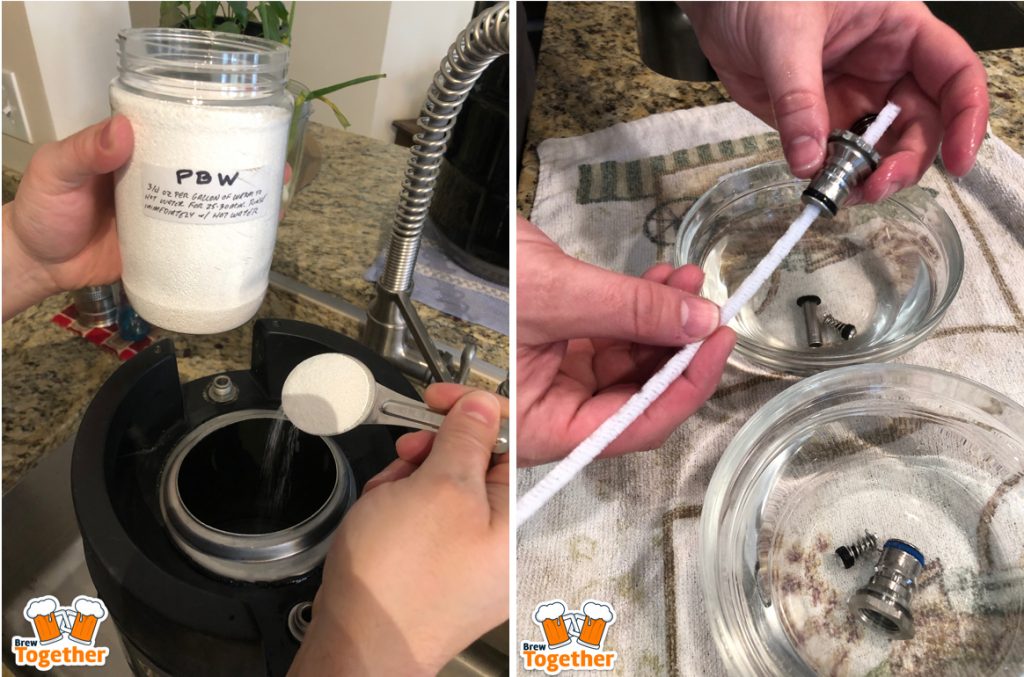
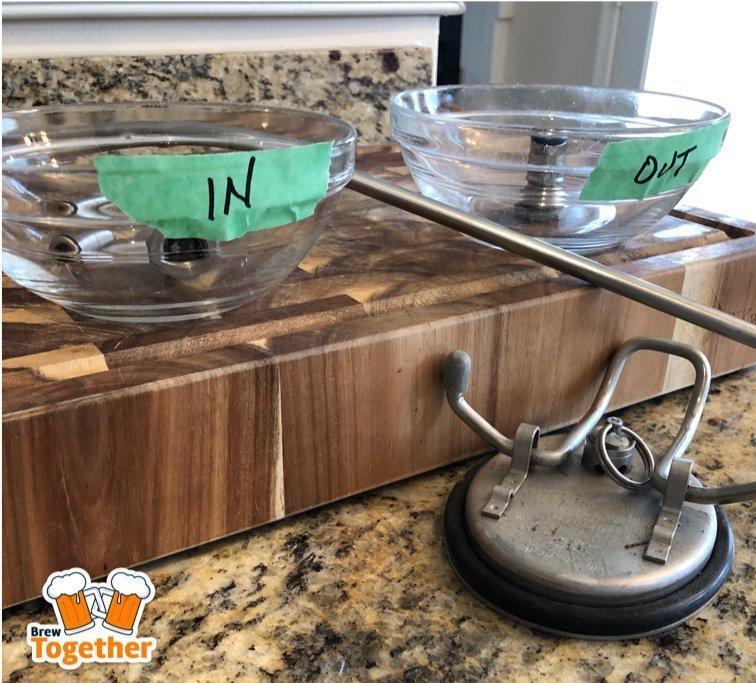
As you remove the first post, ensure you don’t lose the poppet valve inside of the post. We recommend having 2 small bowls ready and labeled as “Out” and “In” as you disassemble the keg to make sure you don’t mix up the posts. Full the bowls with a keg-friendly brewery wash, such as PBW, mixed with the appropriate amount of water.
If you accidentally switch the posts when you reassemble the keg, you may not be able to connect your gas and beer lines once the keg is filled.
The “In” (Gas) post will have a short dip tube in the hole where the post was. Remove it and put it in the bowl with the “In” post.
Inspect the o-rings on the posts to ensure they are not damaged.
Step Five: Clean the Components
Using a keg-safe brewery wash such as PBW, clean each component of the keg.
Poppets can be removed from the posts and soaked in brewery wash while you are cleaning the other components.
Use a clean cloth and brewery wash to clean the inside and outside of the keg and rinse well.
Fill the keg with a brewery wash mixture and soak the lid and beer line dip tube in the solution.
Use a long pipe cleaner to clean out the dip tubes as necessary.
After soaking all of the components, rinse each well ensuring to remove all of the brewery wash, dry, and reassemble.
Step Six: Reassemble
Carefully reinsert poppets in to the posts.
Make sure to use the beer line dip tube and post on the “OUT” side of the keg and the short dip tube and gas line post on the “IN” side of the keg.
Use a crescent wrench to tighten the posts back onto the keg. Be careful not to strip the threading.
Put the lid back on the keg by inserting the long end of the lid in the opening sideways, turn the lid 90 degrees, and pull the handle down to lock the lid in place.
…And You’re Done!
Grab a victory beer! Your keg is now clean and ready to be sanitized and filled.
Do you have a batch ready to be kegged? If so, check out our Step-By-Step Guide to Sanitizing Corny Kegs. The steps will look familiar! They are largely the same as the steps used to clean the keg. Disassemble it, placing all components in a brewing sanitizer such as StarSan, but do not rinse. You can then reassemble the keg, fill it with beer, and soon you’ll have beer on tap!
How do you clean your kegs? Do you have any tips or tricks to share with the BrewTogether Community? Leave a comment below or post in the forums!
Thank you for reading! If you like this article, it would mean the world to us if you would share it with your friends using the social media share buttons below.
If you’re not a member of BrewTogether, we’d love for you to join! BrewTogether is completely free, and signing up is easy! Click here to join!
Affiliate Disclosure: BrewTogether is a participant in the Amazon Services LLC Associates Program, an affiliate advertising program designed to provide a means for us to earn fees by linking to Amazon.com and affiliated sites. BrewTogether is also a participant in an affiliate program with MoreBeer, our favorite online homebrewing equipment/ingredients retailer. Some of the links in this article are affiliate links, which means that if you choose to make a purchase after clicking the link, I will earn a small commission at no additional cost to you. Please feel free to reach out with questions. Thank you for your support!


Responses